


Rescue Mode boots your VPS into a lightweight Debian-based recovery environment instead of your normal operating system. Use it when your VPS will not boot, the file system is corrupted, or you are locked out and need to recover data or fix configuration files.
Supported VPS types: KVM, XEN-HVM, XEN-PV only. Rescue Mode is not available for OpenVZ or LXC containers.
Enable Rescue Mode
- Log in to your Virtualizor End User Panel.
- Click List VPS in the left sidebar.
- Click the manage arrow icon next to your VPS to open the management page.
- Locate the Rescue Mode button on the management page.
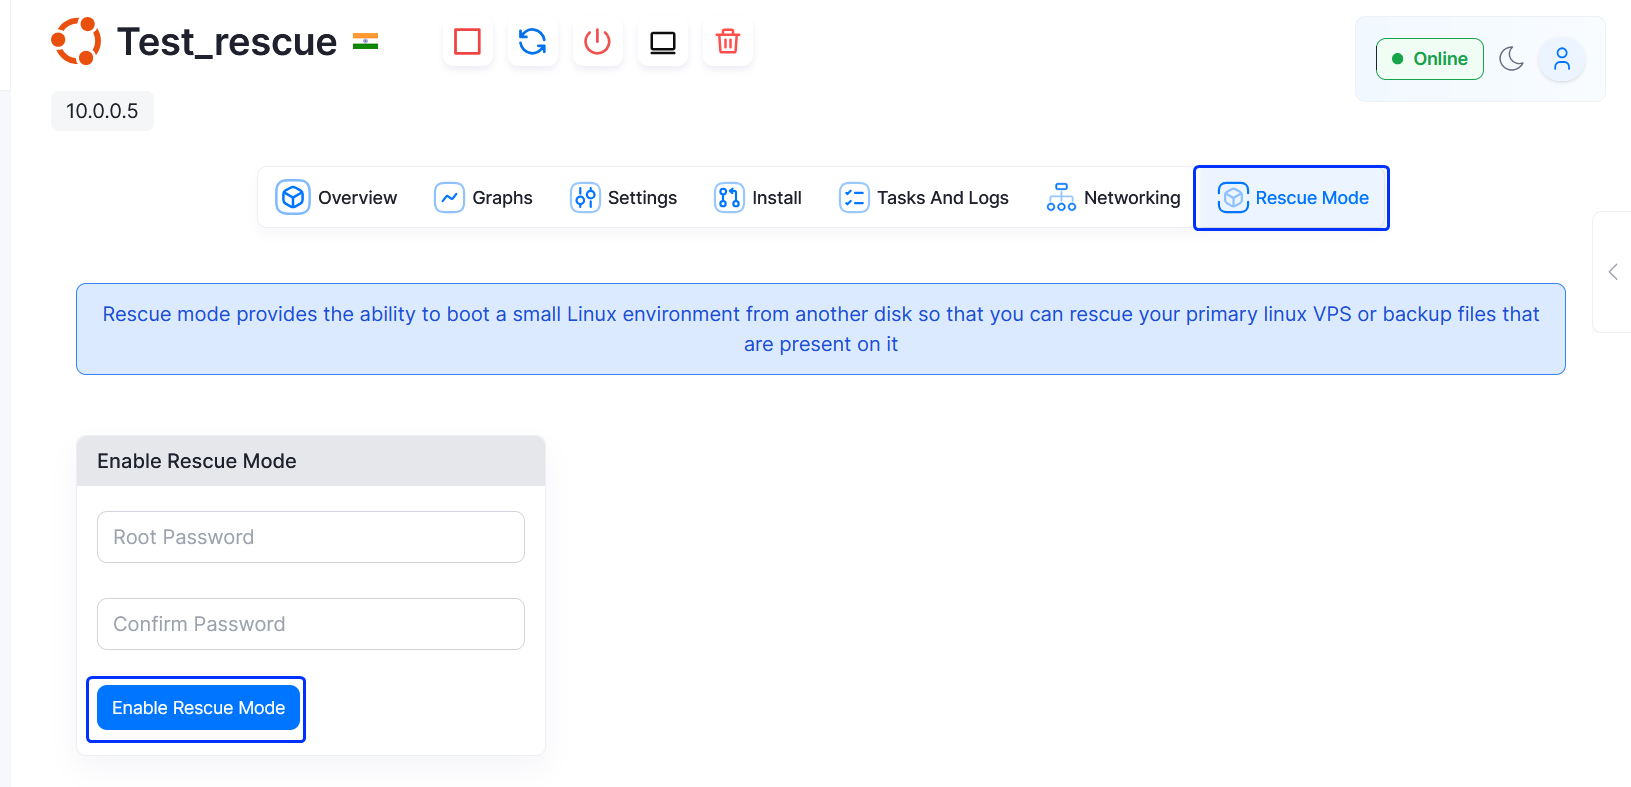
- Enter a root password for the rescue environment. This is a temporary password used only while rescue mode is active — it does not change your normal VPS root password.
- Click Enable Rescue Mode.
Note: If this is the first time rescue mode has been used on this VPS, it will take 3 to 5 minutes to enable. Subsequent uses are faster.
Access the rescue environment
Once rescue mode is active, your VPS is running a minimal Debian system. Your original OS disk is attached but not booted.
- Connect via SSH using the root password you set in step 5:
ssh root@your-vps-ip - If SSH is not accessible, use the VNC console from the Virtualizor management page instead.
Mount your original disk to recover data
Your original VPS disk is attached as a block device (typically /dev/vdb or /dev/sdb). To access your files:
- List available disks to find your original disk:
lsblk - Create a mount point:
mkdir /mnt/recovery - Mount the disk (replace /dev/vdb1 with the correct partition from the lsblk output):
mount /dev/vdb1 /mnt/recovery - Your original files are now accessible under /mnt/recovery. You can copy files, edit configuration files, or repair the file system.
For LXC containers: the original disk is mounted automatically at /mnt.
Common recovery tasks:
- Copy important files off the disk before reinstalling the OS
- Fix a broken /etc/fstab that is preventing boot
- Reset the root password by editing /mnt/recovery/etc/shadow
- Run fsck to repair a corrupted file system:
fsck -y /dev/vdb1
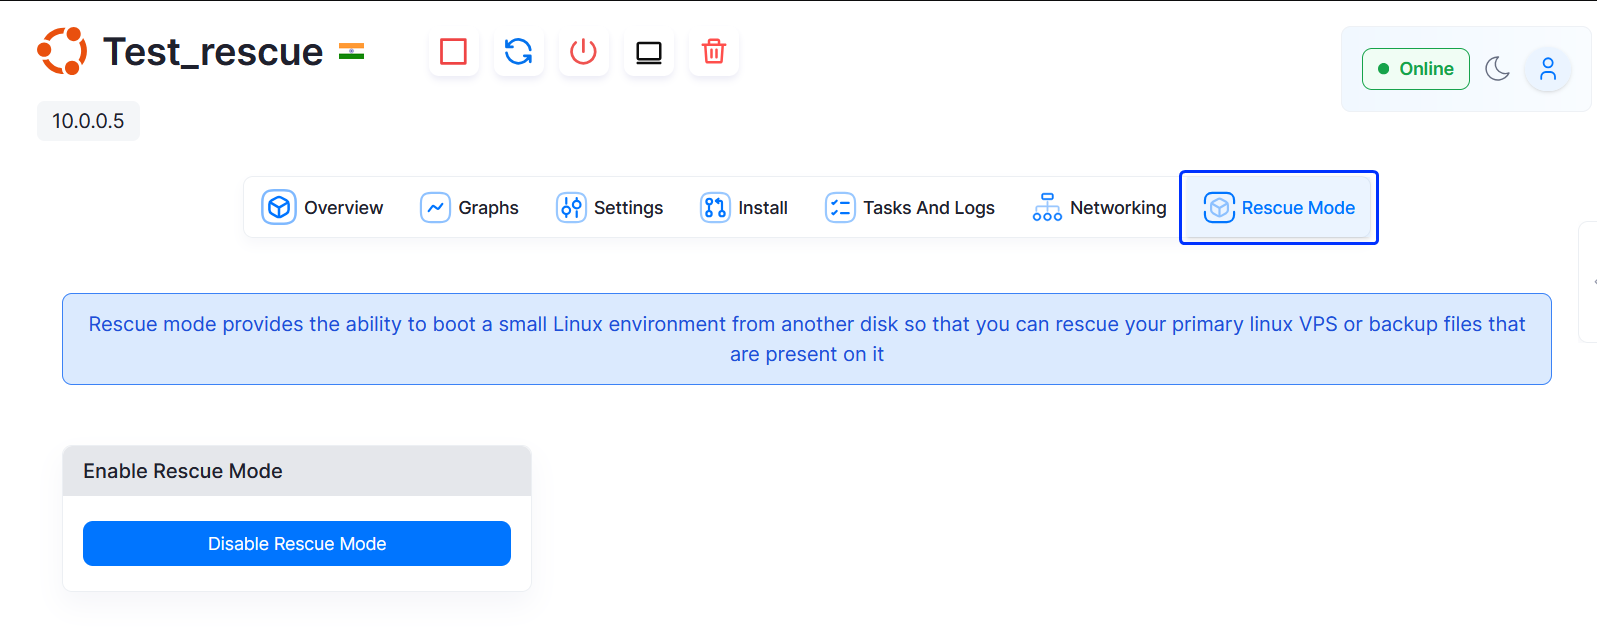
Disable Rescue Mode
When you are finished, disable rescue mode to boot back into your normal OS.
- Return to the Virtualizor management page for your VPS.
- Click Rescue Mode.
- Click Disable Rescue Mode.
- Your VPS will restart and boot normally.
If Virtualizor shows "no actions are allowed": click the Reload icon to refresh the page. All actions will become available again after rescue mode is fully disabled.
Troubleshooting
- Rescue mode not available: this feature is only supported on KVM, XEN-HVM, and XEN-PV VPS types. If you are on an OpenVZ or LXC VPS, contact TPC Hosting support for alternative recovery options.
- Cannot connect via SSH after enabling: wait the full 3–5 minutes, then try again. If still unreachable, use the VNC console from the Virtualizor management page.
- Disk not visible inside rescue: run
lsblkorfdisk -lto list all attached block devices and identify the correct disk name.
